
A garden fountain can turn a simple backyard into a peaceful retreat with the soothing sound of flowing water. Imagine a fountain you’ve made yourself from an old well, making your garden beautiful and unique. This DIY approach helps you make a durable fountain without spending much, and it’s great for both newbies and experienced DIYers. So, follow the simplest DIY guide and start transforming your garden into a pretty oasis!
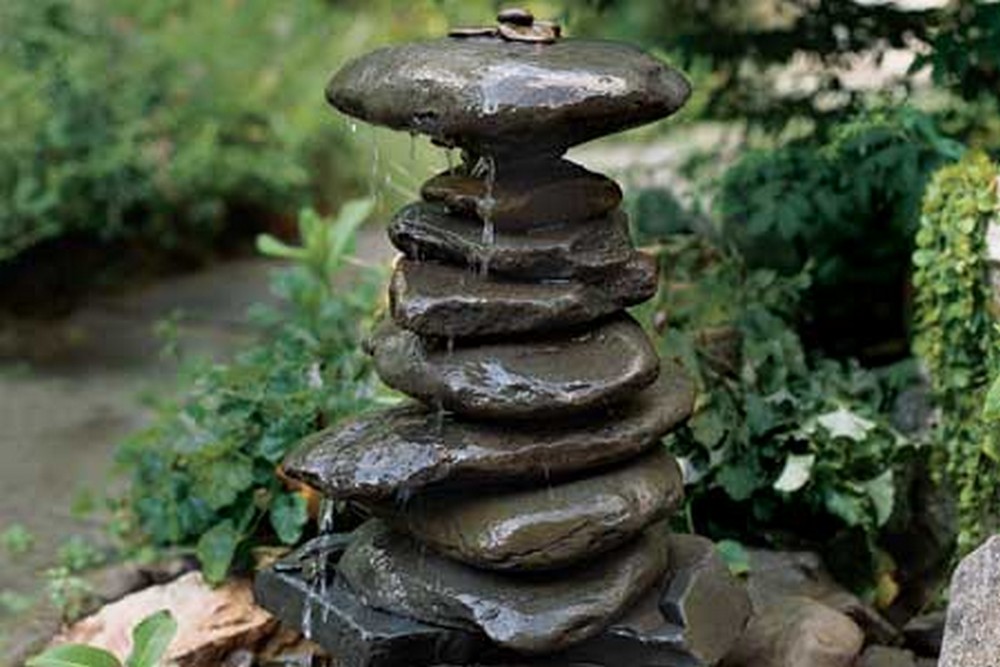
This DIY garden fountain guide is great for making a cost-effective and personalized water feature using any materials you have, fitting your garden’s look. It’s easy to follow, even for beginners, and helps create a relaxing, beautiful space that attracts birds and masks noise, making the outdoors more enjoyable. The design is durable, low maintenance, and can slightly cool the area, making it practical and decorative for anyone wanting to improve their garden ambience on a budget. Below, you will find all kinds of info regarding the anatomy, the best materials, and assembling this awesome DIY creation.
Making Your Garden Fountain Out Of Well
Learn the Anatomy and Go to the Store
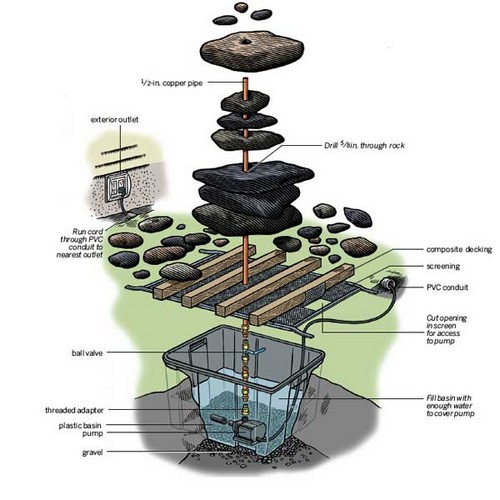
- Water: Flows up a pipe and trickles back down in a continuous cycle
- Pump: Propels the water (submersible pump recommended)
- Sculpture: The piece over which the water flows (can be stones, pavers, metals, or pottery)
- Water Basin: A waterproof tub or basin to hold water and support the fountain
- Mesh Screen: Placed over the basin to block debris
- Support System: Made from composite decking to support the fountain
- Submersible Pump: Sits below the water line, recirculating and filtering runoff
- Pipe with Ball Valve: Carries water to the top and allows flow adjustment
Materials:
- Pump: Submersible, rated in gallons per hour (gph) – a 250-gph pump will suffice.
- ½-Inch Copper Pipe: 2 feet longer than the fountain’s height.
- Waterproof Basin: Plastic storage bin, mortar-mixing bucket, or washtub; wider and taller than the fountain base.
- Stones: For the fountain body.
- Small Rocks: To cover the top of the pit.
- ½-inch Compression Female Adapter: To connect the pipe to the pump.
- ½-inch Ball Valve: To regulate the water flow.
- Screen: To protect the pump from debris.
- Composite Decking: To support the fountain.
- Drainage Gravel: For the catch basin. Two 50-pound bags are recommended.
- 1-inch PVC Conduit: To carry the pump’s power cord underground.
Step-by-step Process
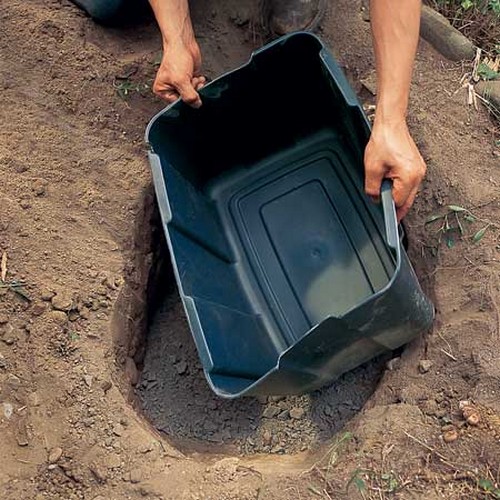
Step 1: Dig the Pump Hole
Dig a pit for your basin with an additional 2-inch depth for the layer of drainage gravel.
Step 2: Set the Basin and Conduit
Place the basin on top of a 2-inch-thick bed of drainage gravel in the pit, ensuring stability. Lay PVC conduit from the exterior outlet to the edge of the pit.
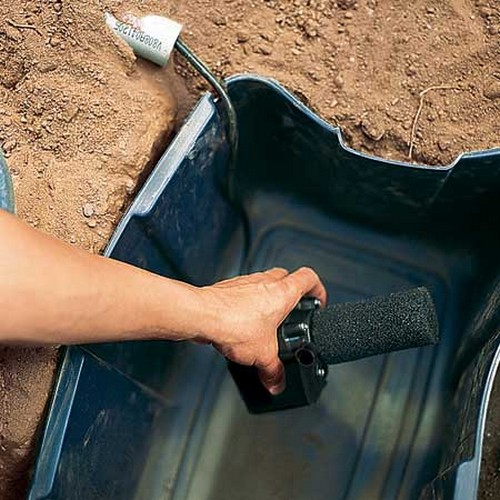
Step 3: Dry-fit the Parts
Center the pump in the basin, place the screen over it and mark the location where the pump’s outlet meets.
Step 4: Mark an Opening
Cut a 1-inch circle on the screen for pump access and a flap near the conduit.
Step 5: Connect the Pipe and Pump
Assemble the copper pipe and ball valve, connect to the pump with compression fittings and place them into the basin.
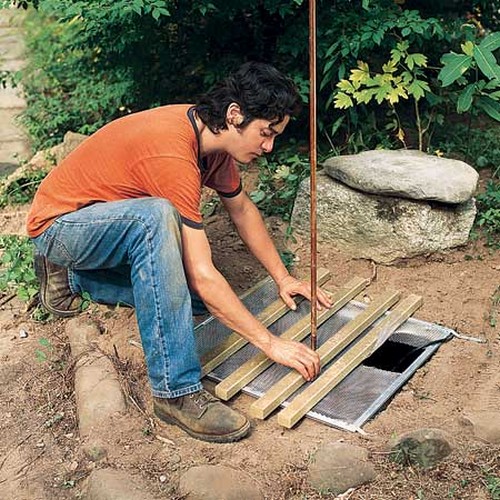
Step 6: Fit the Decking
Use the composite decking to cover the pit over the mesh screen, which protects the pump.
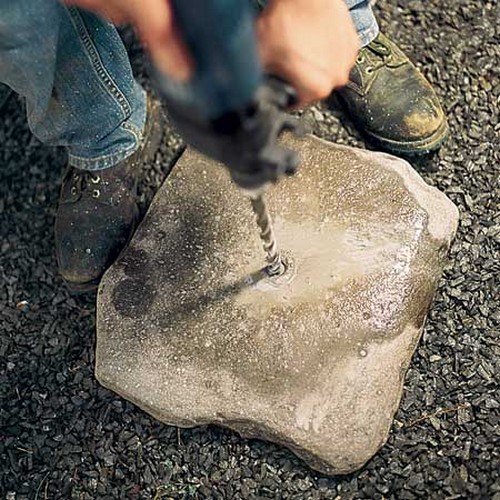
Step 7: Drill the Stones
Number your stones and drill through them with a hammer drill and masonry bit, keeping them wet as you work.
Step 8: Assemble the Fountain
Stack the drilled stones on the copper pipe, cut the pipe to the correct height, and fill the basin with water before testing the pump.
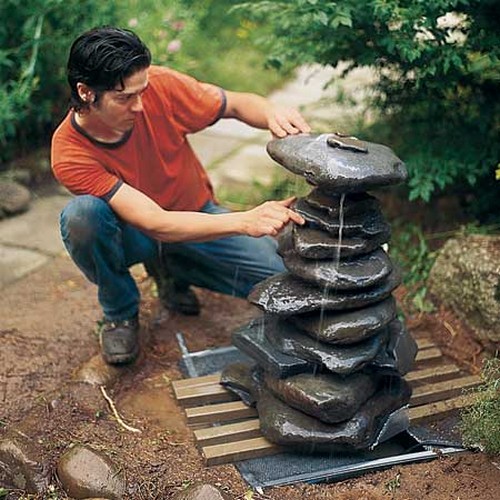
Step 9: Finish Up
Adjust the stack of stones and stabilize them, using silicone adhesive if desired. Camouflage the base with small stones and regularly check and maintain the water level.
Leave a Reply