
Keep the aroma of freshly baked pizza in your mind, wafting through your backyard, sizzling cheese, and the joy of pulling out a piping hot pie from your homemade pizza oven. The satisfaction of building something with your hands is unparalleled, especially when it leads you to the perfect slice of pizza heaven. This project promises delicious meals and a testament to your ingenuity and skill—a centerpiece at garden parties and a warm hearth in the chill of winter. So, roll up your sleeves because we’re about to start a flavorful journey of building your pizza oven.
How To Make A Homemade Pizza Oven
Materials Needed
Substrates and Adhesives:
- Sharp sand (general purpose with a mix of small aggregates)
- Builders sand (a finer quality for detailed work)
- Cement
- Aggregate
Structural Elements:
- Bricks (preferably heat-resistant)
- Chipboard (suitable for outdoor usage)
- Wooden pallet
Additional Supplies:
- Large cellophane sheet
- Old pieces of wood or foam (for arch shaping)
- Optional: Bucket or pot (for the chimney)
Tools Required
- Spade (for mixing concrete)
- Trowel (for laying bricks)
- Wood Saw (for cutting chipboard)
- Drill (for assembling the base)
- Wood Screws (for assembling the base)
Steps to Assemble Your Homemade Pizza Oven
Preparing the Base: Locate a spot that can accommodate the breadth of this project and lay down the wooden pallet, ensuring it sits perfectly level. Use off-cuts of wood as shims to balance the pallet if necessary. Tailor a piece of chipboard to fit the pallet’s top snugly and circle it with 50mm high chipboard strips to form a boundary. This holds the poured concrete in place. Mix your concrete (ratio: 1 part cement, 2 parts sharp sand, 4 parts aggregate) and fill the wooden mold, leveling it with a baton to smooth out the surface—this will act as the foundation for your culinary edifice.
Brick Layout and Planning: Strategically place the bricks on the base to determine the quantity needed and their desired arrangement. Split the bricks into halves for a more contoured shape and a snug fit on the curved surface.
Building the Arch:
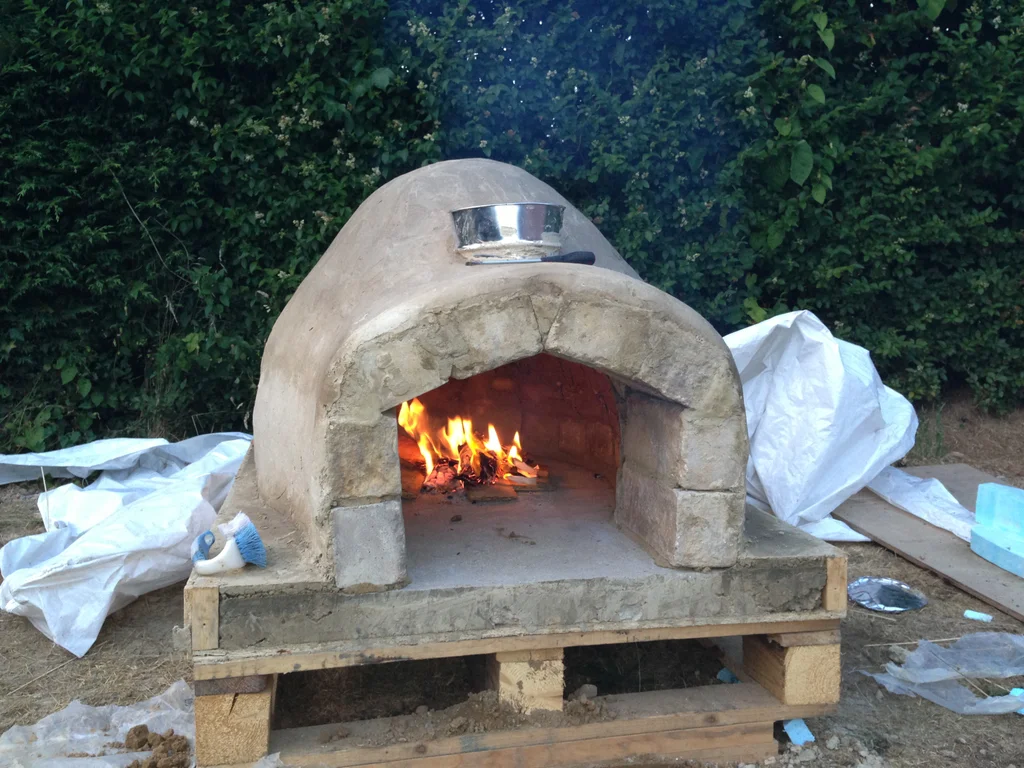
The oven’s dome will be crowned with an arch. Use your foam or spare wood to form a temporary support, and with the help of the trowel, carefully construct the arch, benefiting from the inherent stability of the curved structure. This will be the entrance to your pizza oven and a crucial element for its structural integrity.
Assembling the Brick Walls: Mix a finer batch of mortar (1 part cement to 3 parts builders sand) to lay the bricks. Use the trowel to apply the mortar, beginning with the base and arch. A sand dome wrapped in cellophane is erected over the base as a temp structure on which the brick walls will be built—this prevents collapse and does not adhere to the mortar.
Sculpting the Oven’s Sphere: Upon achieving the desired height and shape with the brick walls, position and cement the chimney appropriately—just above the oven’s opening. A messy cement appearance is fine; the next step will rectify this.
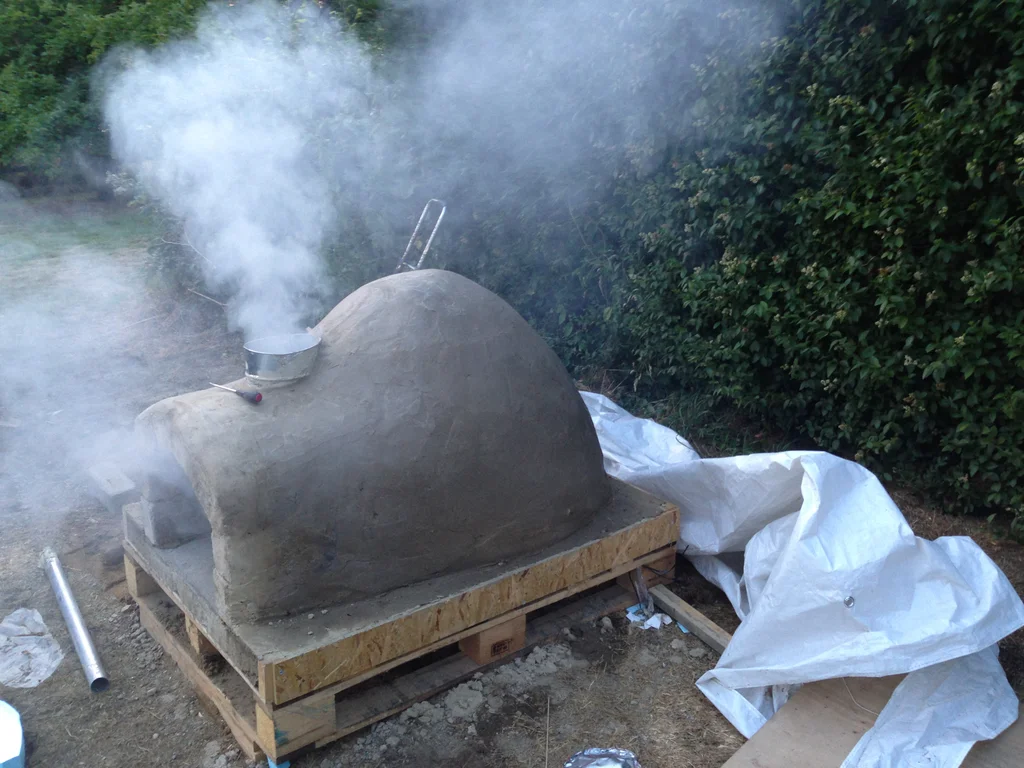
The Outer Concrete Layer:
Cloak the dome’s exterior with another concrete batch (as in Step 1). This finishing touch not only refines the appearance but also bolsters the heat insulation, ensuring your oven stays hot for longer.
Step 7: Removing Inner Supports: After allowing ample time for the concrete to cure, it’s time to dismantle the foam or wood supports underneath the arch. The bag of sand must also carefully evacuate from inside the dome. Removing the plastic and the remaining sand and leaving behind a hollow ready for its first firing.
Initial Heating and Cooking!: Begin with a modest fire to gradually draw out residual moisture inside the oven. Starting small will preempt any premature cracking. Once acclimatized, you can graduate to full-sized fires and embark on your pizza-making adventures!
Leave a Reply